Quick Start
This chapter will introduce you to all the syntax and basic concepts of Ribir.
You will learn
- How to create and compose widgets
- How to respond to events and operate data
- How to make the view automatically respond to data changes
- How to build dynamic widgets
- How to map your own data structure to a view
- How to use built-in widgets as part of other widgets
- How to convert, separate and trace original state -- to facilitate the transfer of state and control the scope of view updates
What is a widget?
In Ribir, the widget is the basic unit for describing the view. In form, it can be a button, a text, a list, a dialog, or even the entire application interface. In code, it can be a function, a closure, or a data object. The type that Ribir can build Widget through &BuildCtx is called widget. Note the difference between Widget and widget, in the context of the entire Ribir, widget is a generic term, and the capitalized Widget is a specific widget, which is also the pass for all widgets to enter the view.
If you don't understand the above words very well, don't worry, because you don't need to care about the construction process of the widget at all, and Ribir also prohibits developer interference in this process. You only need to understand that Ribir divides all widgets into four categories:
- function widget
ComposewidgetRenderwidgetComposeChildwidget
This chapter will only introduce function widget and Compose widget. Because in most scenarios, these two widgets are enough to meet our needs. As advanced content, we will cover Render widgets and ComposeChild widgets in Widget In-depth.
Function widget
The function or closure that accepts &BuildCtx as the input parameter and returns the Widget is called a function widget.
A function widget is the simplest way to define a widget without external state dependencies. In Try Ribir, you have seen a function widget of Hello world!. In this section, we will continue to introduce it through the example of Hello world!.
Define widget through function
A function widget can be defined directly through a function:
use ribir::prelude::*;

fn hello_world(ctx!(): &BuildCtx) -> Widget {
  rdl!{ Text { text: "Hello World!" } }
    .build(ctx!())
}

fn main() {
  App::run(hello_world);
}
At first, you should find the difference in the parameter declaration (ctx!(): &BuildCtx) in the function signature. We use ctx!() as the parameter name instead of directly giving a name. This is because rdl! will unify ctx!() as the variable name to refer to &BuildCtx inside.
Then, you can see the next line rdl!{ Text { text: "Hello World!" } }, which creates a Text with the content Hello World! through rdl!. The details of rdl! will be put aside for now, and will be introduced in detail in the section Creating objects using rdl!.
Finally, build Text into Widget through the build method as the return value of the function.
Tip
There are multiple procedural macros in Ribir, and
&BuildCtxis often used as a variable that needs to be passed across macros. In order to simplify this passing process, Ribir usesctx!as the variable name in this case to allow it to be used across macros. So, you will often see the macroctx!in the future.
Closure and fn_widget!
Because hello_world is not called by anyone else, you can rewrite it as a closure:
use ribir::prelude::*;

fn main() {
  let hello_world = |ctx!(): &BuildCtx| {
    rdl!{ Text { text: "Hello World!" } }
      .build(ctx!())
  };
  App::run(hello_world);
}
For function widgets created through closure, Ribir provides a fn_widget! macro to simplify this process. Except for the two syntactic sugars @ and $ that we will talk about later in this chapter, you can simply think it will expand the code like this:
move |ctx!(): &BuildCtx| -> Widget {
  {
    // Your code
  }
  .build(ctx!())
}
The hello_world example is rewritten with fn_widget!`:
use ribir::prelude::*;

fn main() {
  App::run(fn_widget! {
    rdl!{ Text { text: "Hello World!" } }
  });
}
Do you notice that except for not using @, this example is already the same as what you saw in Creating an application.
Creating objects using rdl!
rdl is the abbreviation of Ribir Declarative Language, and the purpose of the rdl! macro is to help you create objects in a declarative way.
Notice
rdl!does not care about types, it only does processing at the syntax level, so it is not only widgets that can use it.
Declarative creation of objects
Although rdl! supports any Rust expression, but what we mean by declarative creation of objects, specifically refers to the way of creating objects through structure literals.
When your expression is a structure literal, rdl! will create an object through the Declare trait, which requires that the type of the object you create must inherit or implement the Declare trait.
use ribir::prelude::*;

#[derive(Declare)]
pub struct Counter {
  #[declare(default = 1usize)]
  count: usize,
}
// `rdl!` only allow to be used in a context with `ctx!(): &BuildCtx` accessible.
// So we use a function with `ctx!()` parameter to provide this context.
fn use_rdl(ctx!(): &BuildCtx) {
  let _ = rdl!{ Counter { } };
}
In the above example, Counter inherits Declare and marks the default value of count as 1. So in rdl!, you don't need to assign a value to count, rdl! will assign it a default value of 1 when creating it. Declare has some other features, which we will not expand here.
Composing widgets
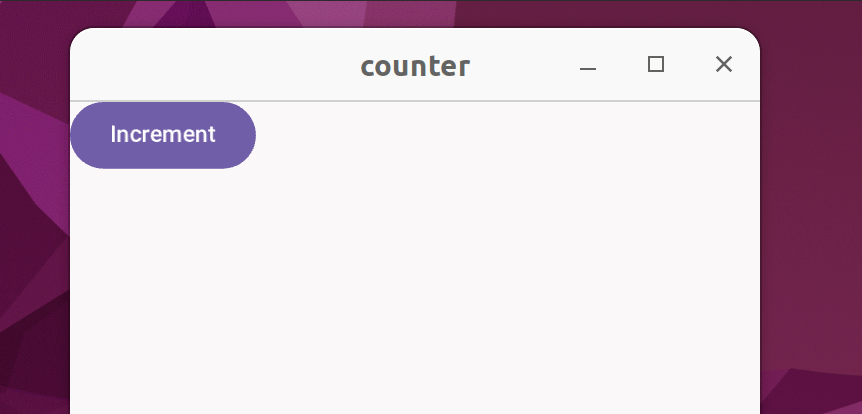
You already know how to create a widget, and now we will compose a simple counter application by nesting widgets in another widget.
You can nest additional rdl! instances as children within the widget declared by the structure literal. Please note that child widgets must always be declared after the parent widget's properties. This is a formatting requirement of rdl!.
use ribir::prelude::*;

fn main() {
  let counter = fn_widget! {
    rdl!{
      Row {
        rdl!{ FilledButton {
          rdl!{ Label::new("Increment") }
        }}
        rdl!{ H1 { text: "0" } }
      }
    }
  };

  App::run(counter);
}
In the above example, we created a Row with two child nodes, FilledButton and H1. These three widgets are already defined in the ribir_widgets library.
rdl! also allows you to declare children for widgets that have already been created:
use ribir::prelude::*;

fn main() {
  let counter = fn_widget! {
    let row = rdl!{ Row { align_items: Align::Center } };

    rdl!{
      $row {
        rdl!{ FilledButton {
          rdl!{ Label::new("Increment") }
        }}
        rdl!{ Text { text: "0" } }
      }
    }
  };

  App::run(counter);
}
Do you notice the rdl!{ $row { ... } }? It is the same as the structure literal syntax, but with $ in front of it, it means that it is a variable rather than a type, so it will not create a new widget, but directly use this variable to compose with the child.
Tip
In Ribir, the composition of parent and child widgets is not arbitrary, but subject to type constraints. The parent can restrict the type of the child and implement the composition logic, ensuring the correctness of the composition.
In our example above,
Rowaccepts any number and any type of widget,Textcannot accept any children, andFilledButtonis a bit more complicated, it allows to accept aLabelas its text and aSvgas the button icon.For how to constrain the child type of the widget, we will introduce it in Widget In-depth.
Creating objects through expressions
Except for creating objects through structure literals, you can also create objects by wrapping any expression with rdl!{...}. The advantage of this approach is that you can write any code in {...} to create objects. This is very useful in nested composition, and it is only necessary when nesting as a child. The following example shows how to use expressions to create objects in rdl:
use ribir::prelude::*;

let _ = fn_widget! {
  rdl!{ Row {
    rdl!{
      // you can write any expression here, the result of the expression will be the child
      if xxx {
        ...
      } else {
        ...
      }
    }
  }}
};
At this point, let's review the previous example:
use ribir::prelude::*;

fn main() {
  App::run(fn_widget! {
    rdl!{ Text { text: "Hello World!" } }
  });
}
I believe you should have fully understood it.
The @ syntactic sugar
In the process of composing widgets, we use a lot of rdl!. It allows you to have a clear declarative structure when interacting with Rust syntax (especially complex examples)-when you see rdl!, you know that the composition or creation of a widget node has begun; on the other hand, when each node is wrapped with rdl!, it looks too long to see the key information at a glance.
Fortunately, Ribir offers a syntactic sugar, @, as an alternative to rdl!. In practice, we almost always use @ instead of rdl!. There are three use cases:
@ Row {...}as a syntactic sugar for structure literals, expanded tordl!{ Row {...} }@ $row {...}as a syntactic sugar for variable structure literals, expanded tordl!{ $row {...} }@ {...}as a syntactic sugar for expressions, expanded tordl!{ ... }
Now let's rewrite the previous example of Counter using @:
use ribir::prelude::*;

fn main() {
  App::run(fn_widget! {
    @Row {
      @FilledButton {
        @ { Label::new("Increment") }
      }
      @Text { text: "0" }
    }
  });
}
State -- make data watchable and shareable
Although we have created a counter, it always shows 0 and does not respond to the button. In this section, you will learn how to make your counter work through state.
The state is a wrapper that makes data watchable and shareable.
State = Data + Watchable + Shareable
The complete life cycle of an interactive Ribir widget is as follows:
- Convert your data to a state.
- Declaratively map the state to build the view.
- During the interaction, modify the data through the state.
- Receive data changes through the state, and update the view point-to-point according to the mapping relationship.
- Repeat steps 3 and 4.

Now, let's improve our example by introducing the state.
use ribir::prelude::*;

fn main() {
  App::run(fn_widget! {
    // Change 1: Create a state through `State::new`
    let count = State::value(0);

    @Row {
      @FilledButton {
        // Change 2: increase the count by 1 when the button is clicked
        on_tap: move |_| *$count.write() += 1,
        @ { Label::new("Increment") }
      }
      // Change 3: display the count through the state, and keep the view continuously updated.
      @H1 { text: pipe!($count.to_string()) }
    }
  });
}
Through the above three changes, the Counter example is complete. But in changes 2 and 3, new things have been introduced -- $ and pipe!. They are very important usages in Ribir, let's introduce them in two sections.
The $ syntactic sugar
There are two important syntactic sugars in Ribir, one is the @ syntactic sugar we introduced earlier, and the other is the $ syntactic sugar.
Read and write references to state
$ represents a read or write reference to the state that follows it. For example, $count represents a read reference to the count state, and when it is followed by a write() call, it represents a write reference to the count state, such as $count.write().
Except for write, Ribir also has a silent write reference, modifying data through silent write reference will not trigger view updates.
The $ syntactic sugar for a state is expanded to:
$counter.write()expand tocounter.write()$counter.silent()expand tocounter.silent()$counterexpand tocounter.read()
Automatic sharing of state
When $ is in a move closure, the state it points to will be cloned (read/write), and the closure captures the clone of the state, so $ allows you to directly use a state and easily complete sharing without having to clone it separately.
move |_| *$count.write() += 1
Roughly expanded to:
{
  let count = count.clone_writer();
  move |_| *count.write() += 1
}
The priority of syntactic sugar expansion
Do you remember that we also used $ in Composing widgets? For example, rdl!{ $row { ... } } or @$row { ... }, this is not a reference to state data. Because rdl! gives it a different semantics -- declare the parent widget through a variable.
No matter @ or $, they should first follow the semantics of the macro they are in, and then as a syntactic sugar of Ribir. When we use @ or $ in a macro that is not provided by Ribir, they no longer be a syntactic sugar of Ribir, because the external macro may use them with special semantics. For example:
use ribir::prelude::*;

fn_widget!{
  user_macro! {
    // `@` is not a syntactic sugar here, its semantics
    // depends on the implementation of `user_macro!`
    @Row { ... }
  }
}
Pipe stream -- keep responding to data
A Pipe stream is a continuously updated data stream with an initial value. It can be decomposed into an initial value and an RxRust stream -- the RxRust stream can be subscribed. It is also the only channel for Ribir to update data changes to the view.
Ribir provides a pipe! macro to help you quickly create a Pipe stream. It accepts an expression and monitors all states marked with $ in the expression to trigger the recalculation of the expression.
In the following example, sum is a Pipe stream of the sum of a and b. Whenever a or b changes, sum can send the latest result to its downstream.
use ribir::prelude::*;

let a = State::value(0);
let b = State::value(0);

let sum = pipe!(*$a + *$b);
When declaring an object, you can initialize its property with a Pipe stream, so that its property will continue to change with this Pipe stream. As we have seen in State -- make data watchable and shareable
@Text { text: pipe!($count.to_string()) }
Dynamically render different widgets
At this point, all the structures of the views you create are static, and only the properties will change with the data, but the structure of the widget will not change with the data. You can also create a continuously changing widget structure through the Pipe stream.
Suppose you have a counter that doesn't display the count with numbers, but instead uses red squares to represent the count:
The code:
use ribir::prelude::*;

fn main() {
  App::run( fn_widget! {
    let counter = State::value(0);

    @Row {
      @FilledButton {
        on_tap: move |_| *$counter.write() += 1,
        @ { Label::new("Increment") }
      }
      @ {
        pipe!(*$counter).map(move |counter| {
          (0..counter).map(move |_| {
            @Container {
              margin: EdgeInsets::all(2.),
              size: Size::new(10., 10.),
              background: Color::RED
            }
          })
        })
      }
    }
  });
}
Try to keep pipe! containing the smallest expression
While pipe! can hold any expression, it's best to keep it minimal and use map for transformations. This makes it easier to track changes in pipe! and avoids unnecessary dependencies in complex expressions. So, in the example above, we write:
pipe!(*$counter).map(move |counter| {
  (0..counter).map(move |_| {
    @Container {
      margin: EdgeInsets::all(2.),
      size: Size::new(10., 10.),
      background: Color::RED
    }
  })
})
instead of:
pipe!{
  (0..*$counter).map(move |_| {
    @Container {
      margin: EdgeInsets::all(2.),
      size: Size::new(10., 10.),
      background: Color::RED
    }
  })
}
Chain RxRust operators on Pipe stream
The update push of the Pipe stream is built on top of the RxRust stream, so the Pipe also provides the value_chain method for you to operate on the RxRust stream. Therefore, you can use RxRust operators such as filter, debounce distinct_until_change and other operations to reduce the frequency of updates.
Let's say you have a simple auto-sum example:
use ribir::prelude::*;

fn main() {
  App::run(fn_widget! {
    let a = State::value(0);
    let b = State::value(0);

    @Column {
      @Text { text: pipe!($a.to_string()) }
      @Text { text: pipe!($b.to_string()) }
      @Text {
        text: pipe!((*$a + *$b).to_string())
          .value_chain(|s| s.distinct_until_changed().box_it()),
        on_tap: move |_| {
          *$a.write() += 1;
          *$b.write() -= 1;
        }
      }
    }
  });
}
In the above example, the first two Text will be updated with the modification of a and b, even if the values of a and b do not change -- such as setting the same value to them. The last Text filters out duplicate updates through distinct_until_changed, and it will only be updated when the sum of a and b changes.
So, when we click on the last Text, only the first two Text will be marked as updated, and the last Text will not.
Tip
In general, to identify the dynamic parts of the view, simply look for where
pipe!is used.
watch! watches for modifications to expressions
watch! is a macro that watches for modifications in expressions. It accepts an expression and monitors all states marked with $ in the expression to trigger the recalculation of the expression and push the latest result to the downstream subscriber.
Both watch! and pipe! watch changes in expressions and have similar syntax. However, pipe! comes with an initial value, acting more like a continuously changing value rather than a simple subscribable data stream. On the other hand, watch! is purely a subscribable data stream. As a result, the output of pipe! can be used to initialize widget properties, while the output of watch! cannot.
In short:
pipe!= (Initial Value + RxRust Stream)watch!= RxRust Stream
Of course, you can also use watch! to implement your counter:
use ribir::prelude::*;

fn main() {
  App::run(fn_widget! {
    let count = State::value(0);
    let display = @H1 { text: "0" };

    watch!(*$count).subscribe(move |v| {
      $display.write().text = v.to_string().into();
    });

    @Row {
      @FilledButton {
        on_tap: move |_| *$count.write() += 1,
        @ { Label::new("Increment") }
      }
      @{ display }
    }
  });
}
Compose widget -- describe your data structure
Typically, in complex real-world scenarios, you can't complete all development tasks just by creating some local data and using simple function widgets. You need your own data structures and use Compose widgets to map your data structures to the view.
Using the Compose widget, the Counter example can be rewritten as:
use  ribir::prelude::*;

struct Counter(usize);

impl Counter {
  fn increment(&mut self) {
    self.0 += 1;
  }
}

impl Compose for Counter {
  fn compose(this: impl StateWriter<Value = Self>) -> impl WidgetBuilder {
    fn_widget! {
      @Row {
        @FilledButton {
          on_tap: move |_| $this.write().increment(),
          @ { Label::new("Increment") }
        }
        @H1 { text: pipe!($this.0.to_string()) }
      }
    }
  }
}

fn main() {
  App::run(fn_widget!{ Counter(0) });
}
In the above example, when you implement Compose for Counter, Counter and all writable states of Counter are valid widgets.
Built-in widgets
Ribir provides a set of built-in widgets that allow you to configure basic styles, respond to events, manage lifecycles, and more. The key difference between built-in widgets and regular widgets is that when you create a widget declaratively, you can use the fields and methods of the built-in widget as if they were your own. Ribir will handle the creation and composition of the built-in widgets for you.
Let's take Margin as an example. Suppose you want to set a 10-pixel blank margin for a Text, the code is as follows:
use ribir::prelude::*;

fn main() {
  App::run(fn_widget! {
    // Declare `Margin` as the parent of `Text`
    @Margin {
      margin: EdgeInsets::all(10.),
      @Text { text: "Hello World!" }
    }
  });
}
But you don't have to explicitly declare a Margin, you can write it directly as:
use ribir::prelude::*;

fn main() {
  App::run(fn_widget! {
    // Use the `Margin::margin` field directly in `Text`
    @Text {
      margin: EdgeInsets::all(10.),
      text: "Hello World!"
    }
  });
}
When you create a widget declaratively, you can directly access the fields of the built-in widget, even if you don't explicitly declare them (if you use them in your code, the corresponding built-in widget will be created). For example:
use ribir::prelude::*;

fn main() {
  App::run(fn_widget! {
    // `margin` is not declared
    let mut hello_world = @Text { text: "Hello World!" };
    // But you can still access the `margin` field,
    // It's created with default value when you use it.
    $hello_world.write().margin = EdgeInsets::all(10.);
    hello_world
  });
}
This is extended through the generic type FatObj. Refer to the API documentation of FatObj to see all the extended capabilities it provides.
Map, Split and trace the original state
From the previous sections, you have learned:
- Modifying the state's data will directly update the corresponding view.
- You can use
Composeto map the data to view
Suppose AppData is the data of your entire application, you can use Compose to map it to the view. However, if AppData is complex, using only one Compose to map the view of the entire application will be a disaster in code organization; and the entire application view only depends on one state, which will cause any modification to AppData to update all dynamic parts of the view. In most cases, this will cause your application to not get the best interactive performance.
Fortunately, for state management, Ribir provides a mechanism for transformation, splitting, and tracing the origin state. It allows you to start with a complete application state, and then map or split that state into smaller sub-states. These sub-states can be further mapped or split. Within these sub-states, you can use the tracing mechanism to identify their origin state.
Map and split, convert state to sub-state
The map is to transform a parent state into a sub-state, and the sub-state has the same data as the parent state. Modifying the parent state is equivalent to modifying the sub-state, and vice versa. It only reduces the visible scope of the data, making it easier for you to use or pass only part of the state.
The split is to separate a sub-state from a parent state. The parent and child state also share the same data. The difference is that modifying data through the sub-state will not trigger the views dependent on the parent state to update, and modifying data through the parent state will cause the split sub-state to be invalidated.
What you need to note is that whether it's map or split, the parent and child state share the same data. Therefore, their modifications to the data will affect each other, but the scope of data modifications they push may be different.
Read the following example carefully to help you better understand how state map and split work:
use ribir::prelude::*;

struct AppData {
  count: usize,
}

let state = State::value(AppData { count: 0 });
let map_count = state.map_writer(|d| &d.count, |d| &mut d.count);
let split_count = state.split_writer(|d| &d.count, |d| &mut d.count);

watch!($state.count).subscribe(|_| println!("Parent data"));
watch!(*$map_count).subscribe(|_| println!("Child(map) data"));
watch!(*$split_count).subscribe(|_| println!("Child(split) data"));
state
  .raw_modifies()
  .filter(|s| s.contains(ModifyScope::FRAMEWORK))
  .subscribe(|_| println!("Parent framework"));
map_count
  .raw_modifies()
  .filter(|s| s.contains(ModifyScope::FRAMEWORK))
  .subscribe(|_| println!("Child(map) framework"));
split_count
  .raw_modifies()
  .filter(|s| s.contains(ModifyScope::FRAMEWORK))
  .subscribe(|_| println!("Child(split) framework"));

// Modify data through the split sub-state, the data modification push to both the parent and child state subscribers.
// But only the split sub-state subscribers are pushed framework notifications.
*split_count.write() = 1;
AppCtx::run_until_stalled();
// Print:
// Parent data
// Child(map) data
// Child(split) data
// Child(split) framework

// When data is modified through the parent state, both the data modification and framework notifications are pushed to the subscribers of the parent and child states. However, the split sub-state becomes invalidated.
state.write().count = 3;
// The push is asynchronous, forcing the push to be sent immediately
AppCtx::run_until_stalled();
// Print:
// Parent data
// Child(map) data
// Parent framework
// Child(map) framework

// Modify data through the map sub-state, the data modification push to both the parent and child state subscribers.
*map_count.write() = 2;
AppCtx::run_until_stalled();
// Print:
// Parent data
// Child(map) data
// Parent framework
// Child(map) framework
Because data modification notifications are sent out asynchronously in batches, in the example, for ease of understanding, we call AppCtx::run_until_stalled() after each data modification to force the notifications to be sent. However, this should not appear in your actual code.
If the reader and writer that you map or split from are on the same path, you can use map_writer! and split_writer! provided by Ribir to simplify your code:
// let map_count = state.map_writer(|d| &d.count, |d| &mut d.count)
let map_count = map_writer!($state.count);
// let split_count = state.split_writer(|d| &d.count, |d| &mut d.count);
let split_count = split_writer!($state.count);
If you only want to get a read-only sub-state, you can use map_reader to convert:
let count_reader = state.map_reader(|d| &d.count);
However, Ribir does not provide a split_reader, because splitting a read-only sub-state is equivalent to converting a read-only sub-state.
The origin state of the sub-state
Any state can get where it comes from through origin_reader and origin_writer. The origin state of the root state is itself, and the origin state of the sub-state is where it splits from.
use ribir::prelude::*;

struct AppData {
  count: usize,
}

let state: State<AppData> = State::value(AppData { count: 0 });
let split_count = split_writer!($state.count);

// the root state's origin state is itself
let _: &State<AppData> = state.origin_reader();
let _: &State<AppData> = state.origin_writer();

// the sub-state's origin state is where it splits from
let _: &Writer<AppData> = split_count.origin_reader();
let _: &Writer<AppData> = split_count.origin_writer();
The next step
You have mastered all the syntax and basic concepts needed to develop a Ribir application. It's time to put them into practice by Practice: Todos application.